


Mounting router table plate on router (with router lift)
If you need help quickly, please contact us on Telegram via our Telegram contact.
Mounting jigsaw on universal jigsaw table
Mounting door sills & loading sill protection for vehicles
ATTENTION: Please check the goods for
damage and quality defectsafter unpacking and before installation.Please contact us immediately at
if there is anything wrong.
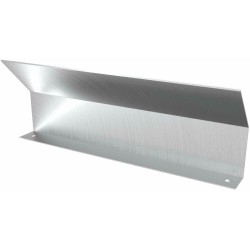
INSTALLATION INSTRUCTIONS FOR ALUMINUM / STAINLESS STEEL MUDGUARDS
1. For a permanent hold, clean the mounting surface very thoroughly and
remove all paint protection substances, wax or similar soiling.
Cleaning agents containing grease or silicone prevent a permanent hold of the
door sill protection strips
2. Do not remove the adhesive protection strips - check the fit in advance,
if the product does not fit exactly, please contact us immediately at
.
3. Mark the installation point
4. Adhesive protection strips can now be removed
5. Insert the door sill trims exactly at the rear markings and press them in slightly downwards
.
Caution! The adhesive tape adheres immediately and very strongly, a correction is usually
not possible and can lead to damage to the strip.
Mounting temperature is 15 °C - 30 °C
If the temperature is not suitable due to the weather, the mounting surface can be warmed up with a
hot air dryer.
INSTALLATION INSTRUCTIONS FOR PAINT PROTECTION FILM
The surface must first be cleaned thoroughly. Agents
such as methylated spirits or glass cleaner have proven effective here.
Before use, the cleaning agent should be checked for paint compatibility
WET BONDING
To make it easier to install the film and to allow for small directional corrections during
installation, the bumper or the entrances should be sufficiently sprayed
with a flower sprayer filled with normal water. Now the actual assembly takes place. Experience has shown that two people
are helpful here. Remove the paint protection film completely from the carrier film and moisten it with water.
Now hold the film at both ends and place it on the
bumper or entrance from the middle. If the direction needs to be corrected, remove the film completely and apply it again. Now start squeegeeing out the film from the center and wipe out the water and bubbles. The rubber side of an ice scraper is recommended here. To secure the edges, we recommend using a heat gun or hairdryer (watch the temperature here!)
DRY BONDING
Before you remove the paint protection film/door sills from the carrier film, place the
individual parts in the appropriate places to ensure that the cut is correct and the size fits. Now the actual installation takes place. Experience has shown that 2 people are helpful here. Remove the paint protection film completely from the carrier film. Now hold the film at both ends. Now carefully position the film without coming into contact with the surface. Once you have found the correct position for application, carefully apply the film from right to left. If the direction needs to be corrected, remove the film and correct the direction. To fix the edges, we recommend using a heat gun or a hairdryer (pay attention to the temperature here!) The film is car wash-proof after approx. 48 hours.
Installation temperature is 15 °C - 30 °C
If the temperature is not sufficient due to the weather, the installation surface can be warmed up with a hot air gun.
Video instructions: